Factors to consider when measuring thickness
Published: 05 April, 2016
If measurements from two non-contact laser displacement sensors are evaluated together, the thickness of an object can be determined. However, the accuracy of thickness measurements is determined by a number of important factors and not just linearity explains Chris Jones, managing director at Micro-Epsilon UK.
Non-contact laser triangulation displacement sensors can be used to measure distance, movement and dimensions. If the measured values from two separate laser displacement sensors are evaluated together, the thickness of an object can be determined from this. Often, the thickness measurement accuracy expected by the user is based solely on the datasheet sensor linearity and resolution statements. However, many more factors not normally considered can result in thickness measurement errors much greater than these values, often an order of magnitude greater. Therefore, in order to achieve an accurate, precise statement of the target thickness, these factors need to be considered.
Alignment of the sensors
Special attention must be paid to the alignment of the two sensors that are installed opposite one another. No misalignment, tilting or inclination of the sensors relative to the target object is permissible. For example, for a misalignment of 1mm and an inclination of 2°, there will be a thickness measurement error of 35µm. In the case of a 10mm target thickness, this error increases to 41µm.
Synchronisation
In order to avoid interference due to movement of the target, both sensors must be perfectly synchronised so that they perform the measurement at the same time, at the exact opposite point of the target. If synchronisation does not occur, inaccurate measurement data is produced. For example, if measurements are taken at different time intervals, micro-vibrations of the target or of the sensor mechanics will result in a thickness measurement error. For example, if 1mm amplitude of vibration occurs at a frequency of 20Hz as a target is moving past the laser sensors, for a time-delay measurement of just 1ms between sensor 1 and sensor 2, a deviation of 125µm is produced!
Positioning of the sensors/measuring range
Position, measuring range, thickness deviation and vibrations must be taken into account when the sensors are installed. For correct thickness measurements, the target must always be located within the ‘measuring range’ of the sensors. If the target moves outside the measuring range at any time, this can lead to inaccurate measurements. In particular, any special operating conditions such as start, stop or speed changes must be carefully considered when positioning the sensors.
Arrangement of laser sensors
Non-contact laser displacement sensors should not be installed until the running direction of the target object has been specified. In this way, higher thickness measurement accuracy and smaller deviations caused by the target surface will be achieved. Shadowing of the laser beam path can also occur if the sensor is incorrectly installed.
Mounting of the sensors
In addition to the above requirements for sensor positioning and alignment, a mechanically and thermally stable sensor mounting frame should be used for the laser sensors. The mounting mechanism should be isolated from process or machine vibration as best as possible. Mounting with an O-frame is more stable than using a C-frame.
Thermal expansion of mounting materials is often overlooked as a source for large error in precise thickness measurement. Therefore, selecting materials with as low a thermal expansion coefficient as possible is very important. For example, mounting sensors on a typical aluminium or stainless steel extruded profile, with a thermal expansion coefficient of ~16ppm/K, experimental testing has shown just a 5°C change in ambient temperature can move the sensors by >80µm! In contrast, using a standard grade Invar mounting frame with a thermal expansion coefficient of typically 1.2ppm/K reduces this to 6µm. Specialist Invar grades can reduce this error by half again.
Measuring rates of laser sensors
Most thickness measurement applications are either in a process/quality control environment where the object to be measured is fast moving, or in a ‘part inspection’ machine where the object is static and the laser sensors are scanning the part in as short a cycle time as possible. In both cases, it is important to match the laser measurement speed to the spatial resolution or cycle time required. Faster measuring rates are not always best as the laser sensor accuracy can suffer on difficult-to-measure surfaces when using high speed measurement rates.
Therefore, selecting as low a laser measurement speed as possible to meet the spatial resolution or cycle time required will enable the laser sensor to receive as much reflected light as possible, which will result in more precise measurements.
Sensor compactness
For thickness measurement tasks where available space to mount the sensors is limited or restricted, the size of the sensor is critical. Non-contact laser displacement sensors are now available with very compact dimensions despite having a fully integrated controller.
For further information please visit: www.micro-epsilon.co.uk


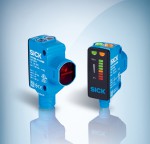
 SICK reports it has developed the SureSense family of user-customisable photo-electric sensors - a concept that enables machine builders and plant engineers to specify from a wide-range of sensing options all within a standard technology, set-up, mounting and housing. The company says the durable SureSense sensors can reliably detect nearly any object in any environment in warehousing and logistics applications – ensuring machines and lines stay up and running at full capacity.
